Make a cat. House for a cat from a cardboard box. Master class: instructions on how to make it yourself, drawings with dimensions, photos. T-shirt house
Cat lovers are often interested in the question of how to make a comfortable soft house for their pet with their own hands. Of course, you can buy ready-made products, but it is much more interesting to make them yourself, taking into account the cat’s character and preferences.
Peculiarities
When looking at the assortment of specialized stores, one can only admire the products for pets. But they are not cheap, and spending money on it is not always wise. After studying, you can try to make a soft shelter for the cat yourself. Please note pay attention to the following details:
- Form– it must correspond to the character and habits of the pet. Some cats like to be visible - an open bed is suitable for them, others prefer to rest in a secluded place - a closed structure like a booth is better for them.
- Next, it is important to decide sizes house. The cat must fit freely in its shelter. If this is a cat, then you will need to take care of future kittens.
- Material for finishing it should not absorb dust and dirt, be easy to wash, meet all safety requirements - have no sharp corners or partitions, no pungent odor.
- The cat must comfortable feel like you are in your hiding place.
It is best to sew a house that will suit the overall interior of the room.
Possibility of design and configuration with other elements
All materials used to construct a soft house are classified into the following groups:

- To create a structure frame - or chipboard. They should not have a pungent odor.
- Plastic is suitable for the base of the bed.
- For soft upholstery - plush or carpet. Soft structural parts are also sewn from them - bedding, pillows, partitions, etc. Cases made of material are filled with foam rubber or synthetic padding; there are also artificial granular fillers that can retain heat.
- The structural connections can be made of metal. This will increase the operating time of the product. Also, the parts are held together with glue, which should not have any odor. A stapler should not be used; its staples may cause injury to the animal.
When making a soft house with your own hands, you need to think about decorating it. Proper decoration of the product helps to organically use it in the interior. The main rule is safety so that the cat does not chew or swallow the parts.
Soft houses are the easiest to decorate. From fabric of a contrasting shade you can sew:
- Imitation of curtains.
- Small pads.
- Animal faces.
- Footprints, etc.
Decorative elements are fixed to the base and you get a cozy soft house for your pet. For the roof, you can make an imitation of tiles, the sun, flowers or bows.
Tools and materials for finishing
You can customize the soft house to suit your taste and give it different shapes. To create a classic model you will need the following tools:
- Foam rubber to hold the shape with side walls, at least 1.5 cm thick.
- It is recommended to lay foam rubber at least 2.5 cm thick on the bottom.
- Dense fabric for decoration, interior and exterior decoration of the house.
Installation and Security
During construction, you should not use sharp fasteners, paper clips, or a stapler so that the animal does not get hurt.
Also, in accordance with the breed of the cat - fluffy or smooth-haired, you need to select fabrics, with or without insulation.
Important!
The material must be natural and not electrified. You need durable fabric so that it does not get damaged by your pet's claws.
Options
There are a huge number of different options for soft houses; you can design your own model to suit your taste and the needs of your pet. She may have additional elements - scratching posts, toys on mounts, etc. The most popular options are:
- Beds (you can see how to design a bed from boxes).
- Booth houses with a round entrance.
- Game complexes.
Soft bed: how to sew?
Not every cat will like a closed house. Many people prefer a comfortable open soft bed to be able to observe what is happening around them.
It is very easy to sew such models.
To create a bed with sides, you will need a small flat pillow suitable for a cat, with a synthetic filler, as well as material for decoration. Creation includes the following steps:
- The pillow is cut to make 2 elongated elements for the sides and one larger one for the bottom. Each piece is tightly sewn, and an additional seam is made in the middle on the sides.
- The decorative fabric is laid out so that all the details of the structure can be covered later.
- Then a bed with sides is formed, a pillow or soft blanket is placed in the middle, which can be washed when it gets dirty.
Useful video
In the video you can find instructions on how to create a bed yourself.
We sew a round house
You can knit a soft house for a cat even from simple strips of knitted fabric.
The work is done with a thick crochet hook. Strips from unwanted T-shirts are pre-cut. The most optimal size of the house is 48 cm with a window of 10 by 20 cm, but first of all you should focus on the cat. Knitting a round bottom starts from the center; it is enough to knit 20 rows.
Sheathing of “hard” material
To finish the hard plywood from which the house is made with a soft cloth, you can use a glue gun. Preference should be given to fabrics with short piles, because long piles become clogged with dust and dirt over time, and the upholstery cannot be removed and washed.
Attention!
If you need to finish a scratching post, then jute, hemp or linen rope is most suitable for this. It is better to take a thicker one so that it is more convenient for the cat to sharpen his nails.
Hammock
Anyone can make the simplest hammock. First, a frame is made of wood, which is sheathed with decorative material, then the roof is installed and the hammock is fixed according to the size of the pet. More complex models are complexes of structures with platforms, shelves, deck chairs, and columns.
You can often find hammocks for cats under a chair; it is easily attached to the legs. The product can be quickly knitted or sewn from fabric.
Useful video
You can watch the video for more details on how to create a hammock for a cat.
From a T-shirt or sweater


 The simplest design of a soft house is made from a T-shirt (if you want something warmer? Use an old sweater). This requires a box the size of the cat. One of the ends is removed, a T-shirt is pulled over the house so that its neck matches the place where there is no wall. This house with a round entrance is very comfortable and easy to design.

Useful video
To learn how to create a cat house from a T-shirt, watch the video below.
The shape of the wigwam is a cone with 6 sides, one of which has an inlet hole. To create a house, first a pattern is drawn on cardboard and then fastened together.
A fabric is attached to the bottom of the wigwam or a flat, comfortable pillow is placed on which the cat will be comfortable to lie on. The outside of the wigwam is covered with textiles.
Useful video
You can see how to make a wigwam for a cat in the video below.
Built-in
Built-in soft houses for pets have recently become very popular. They don't take up any space at all. For example, a bedside table with a soft sleeping place for a cat inside. The inside of these houses is upholstered with plush or other pleasant materials, complemented by a bed or pillow. This option is easy to apply in quality.
From foam rubber
A sleeping place for a cat made of foam rubber turns out to be very cozy and comfortable. To create a house you will need:

- Foam rubber.
- Thick fabric.
- Pencil and paper for pattern.
- Threads.
- Needles.
- Sewing machine.
- Safety pins.
A house for a pet is quick and easy to make. The work consists of the following stages:
- Pattern. The result should be 8 blanks and 2 templates for the bottom.
- The blanks are transferred to the fabric. There must be 2 cm left on the material.
When transferring blanks to fabric, 4 out of 8 fragments are transferred to the front fabric. This will allow you to sew parts along the contours faster later. - The blanks are transferred to foam rubber. 4 parts are made for the walls and 1 for the base.
- The fabric is processed with a zigzag along the entire perimeter.
- Then each piece of foam rubber is covered with 2 pieces of fabric.
- A hole for entry is made in one of the 4 walls and the 4 walls are fastened together.
- The blanks are stitched in the process of fastening from the inside out.
It’s so easy to design a soft foam house for your pet.
Conclusion
A soft house for a cat, made with your own hands in accordance with the habits of the pet, will become a real place of relaxation for him. Also, self-design will save money, since such products are quite expensive in pet stores. Want to see all types of houses? Read this one.
Many people are concerned about how to make a house for a cat, where should you start? First of all, you need to decide on the design. In order for your pet to like the cat corner and for him to actively use it, you need to take a closer look at the habits of your four-legged friend.
You need to pay attention to where he spends the most time, where it is more convenient for him to rest, maybe he prefers to lie on the floor or climb higher.

Thus, when choosing a cat house model, it is best to focus on the pet’s habits, however, there are general nuances that must also be taken into account.

House for cats
One of the features that should be taken into account when creating a corner for your furry pet is its gender. Thus, cats give preference to houses, the design of which includes 2 entrances, as well as pipes or similar structures.

At the same time, a large hole does not allow them to feel safe, for this reason it is best to make the entrance hole small, the main thing is that the cat can pass through it.

You also need to take into account that cats with kittens prefer houses on the floor, and free females love heights.

Corner for cats
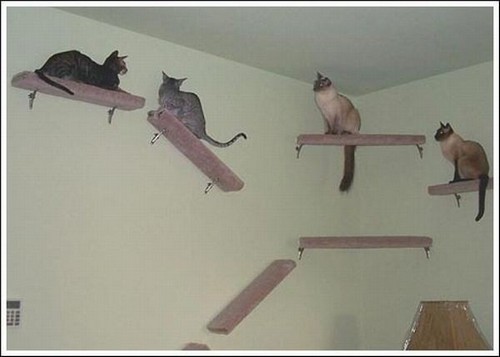
Cats love heights and good visibility, which is provided by comfortable platforms, the dimensions of which should be large enough for the cat to lie down fully stretched out without falling.

Cat Corner Ideas
Of course, you can buy a ready-made, beautiful cat house in the store, however, what could be better than a cozy nest for your beloved pet, made with your own hands.

Before you start creating a cat house, you need to decide on its model, and for this you need to consider several ideas.

Cardboard house
The easiest option is to make a cat house out of a box. For this you will need cardboard and a piece of fabric. For cardboard construction, it is best to use boxes of a suitable size. Textiles will be needed for the interior decoration of the house to make the cat as comfortable as possible in it. And when decorating the facade, you can show your imagination.

So, first the top and bottom of one of the boxes are cut out, then the outer part of the frame is covered with paint. After this, holes are cut out in the house that will serve as windows and an entrance.


Tent
The tent is very convenient for both owners and cats, as it is not difficult to move from one place to another. In addition, you can easily make this secluded cat place yourself. For work you will need: cardboard, thick wire and an unnecessary T-shirt.

First, a drawing of a cat house is made, then an arc-shaped frame consisting of 2 parts is constructed from wire. Then cardboard is attached to them on all sides and a T-shirt is put on, so that its sleeves are fixed at the back, and the neck serves as the entrance. If you know how to sew, you can use a cover instead of a T-shirt.

Bed
If your pet prefers to sleep on pillows, then a soft, cozy bed is ideal for him. However, this option is only suitable for those who know how to sew. When making a cat bed, you can use any textile.

The size of the cat house depends on the size of the animal.

First of all, you need to sew the covers for the pillow, arms and back, then they are put on the padding polyester and sewn together.

Corrugated
The Japanese model of a house made of corrugated cardboard is quite interesting. Such a house can have any shape, but cats love the spherical one the most. In addition, the texture of the facade will also be a scratching post.

First, rings are cut out of cardboard; their size depends on the configuration of the house and the size of the pet. Next, all elements are glued together with PVA glue. A soft pillow is placed inside for comfort.

When a cat lives next to you for many years, it gradually turns into a full-fledged member of the family who needs to create the same comfortable conditions. That is why many owners of furry pets strive to create the most convenient and beautiful design for comfortable rest and entertainment for their pet.
A home for a cat with your own hands is much more profitable in terms of financial costs, takes into account the individual characteristics of the animal, and is selected to match the interior of the apartment.
There are several options for homemade houses - temporary, permanent. The first ones are built at the dacha, where they take the cat with them, and place them in the car when moving. The second ones are in the apartment
Some cat owners are perplexed why build a special house if the animals already live in it. However, if you observe the behavior of your pet, you may notice some strangeness. The cat chooses a place to sleep - curls up on an armchair, climbs into suitcases, niches for shoes, lockers for clothes. Or he constantly climbs onto the bedside table or window sill, causing inconvenience to the owners. And all this is connected with her instincts.
A cat is a predatory animal. Her constant presence in a person’s house makes her not such an aggressive hunter, but wild instincts continue to be present in her. In nature, a cat always has a den, where she sleeps during the day and hides her kittens. And also a shelter from which the animal looks out for prey at night and hides from enemies. A caring, loving owner must take into account the needs of his pet and make his stay in the house as comfortable as possible.
Buy or make it yourself
Currently, in any pet store you can choose any kind of housing for a cat. The variety of shapes and designs is impressive. Stylish, beautiful, and quite expensive. This is the main problem. In addition, it often happens that a pet refuses to live in a purchased house, ignores it in every possible way, bypasses it, and looks askance with distrust.
This behavior of the animal is explained by an overdeveloped sense of smell. The cat gets used to the smell of the house, feels calm in it, other people's aromas alarm it and scare it away. The glue with which the house was assembled, or the material itself, may smell. Another hindrance may be a discrepancy in size.
Of course, you can choose a house, taking into account the cat’s breed, morals, and behavioral characteristics. But, having brought it home, there is no need to rush to introduce it to the residents. Initially, it is worth making sure that it is saturated with the “native” smell. Place it on the balcony for a few days, then keep it unassembled in the apartment for a week. After that, try to introduce it to the cat.
A house made for a cat with your own hands will be more familiar to it, since the smell of its beloved owner will remain in it. The cat will definitely want to stay in it and will purr loudly as a sign of gratitude.
Features of a cat house
You should immediately pay attention to the fact that the house of the cat and cat  differ from each other. The cat is less demanding. All he needs is one manhole, a roof with all-round visibility. In this position, the hunter looks down on everything that is happening, looks out for the victim, and feels safe.
The cat takes care not only of itself, but also of the kittens. Her idea of safe housing is somewhat different. Her home should have an entrance and an additional exit; the observation deck is not located on the roof at all, but a little to the side.
The cat climbs onto the observation deck, watches everything that happens, at the same time, reliably protects the entrance of her shelter with kittens. And if an enemy attacks her, she will be able to ward off the danger from the cubs. If the enemy manages to discover the entrance to the lair with kittens, they will be able to escape through the emergency exit.
A house made for a cat with your own hands must take into account all these features.
Types of homemade houses
All of them are divided into stationary and mobile. The first ones have a more complex design and are manufactured taking into account the fact that they will not be periodically disassembled or moved to another place. Mobile houses are simple, sometimes made quickly from available materials. Suitcases, baskets, old clothes, sheets, bags are used. Anything you can imagine. Such houses should be light and quick to assemble. Pets are placed in them when traveling by car, shopping, and street walks.
A house made for a cat with your own hands can be of different colors, since they do not distinguish colors well. Therefore, this nuance completely depends on the personal preferences of the owner. The animal makes claims about the material from which the house is made.
The following classification of types of housing for cats is based on the form:
- Hammocks are soft loungers that are attached in different ways to the legs of chairs and tables. A cozy cradle appears under the cover of a chair or table.
- Beds are a simple option that does not require much effort to make. Consists of a small elevation, a mattress. For example, you can put it on a basket. Place a wide drawer with faux fur and a mattress made of foam rubber.
- Booth - different materials are used, most often plywood, polystyrene foam. Covered with soft fabric, square or rectangular in shape, there should be a scratching post.
- Cardboard house - made very quickly, a cardboard box or separate sheets are used to create housing of any shape. Beautiful, fast, but short-lived.
- Wigwam - some breeds of cats in the wild live in the hollow hollows of old trees, constantly rising on their hind legs to look out from there. A wigwam is built using this principle.
- Houses with complex structures. They can be built-in or free-standing. They consist of several booths, observation platforms, sunbeds, and scratching posts.
The list goes on, since there are no limits to human imagination. A house made from an old T-shirt, basket, suitcase, burlap, thread, etc. The scheme of each of them is quite simple, the drawings do not take much time.
Do-it-yourself climbing frames for cats: photo


A house made for a cat with your own hands from a box

Surely in every home there is a box in which a cat can easily fit. It is quite suitable for creating a quick house. The simplest option is to place a pillow, mattress, or faux fur in a box. A home made for a cat with your own hands is ready. You can put such a house anywhere. Suitable as mobile housing.
The second option is to cut several holes in the box. One is for the entrance, about 25 cm in diameter. The rest are cut out in the form of windows. This device is made very quickly and does not require special skills. A large box can accommodate several individuals at once. The main disadvantage is its fragility. And the advantage is that you can quickly make a new one to replace it.
House instructions from a T-shirt
A house made for a cat from a T-shirt will surely appeal to your pet. With the condition that an old T-shirt will be used. The design resembles a tent. The material is the simplest, it is always available in the household, it is done in 5 minutes, the diagram is clear, the drawings are available.
Manufacturing instructions
Materials for production:
- T-shirt;
- Scotch;
- Pins;
- Wire;
- Sheet of cardboard – 40*40 cm;
- Wire hanger – 2 pcs.
Scheme and drawings of the labor process: 
- From the hanger - trempel, cut off the upper part - the hook. Bend the rest of the wire in the form of an arc, as for a tent.
- Cover the cardboard with tape. This way it will look a little better and become stronger.
- Fasten 2 wire arcs crosswise. They can stand calmly in this position.
- Adjust this semicircle to the size of the cardboard, pierce the ends in each corner. Wrap from the bottom of the cardboard and secure with tape.
- Place the structure and cover it with a T-shirt. The neck should be at the front of the tent - this is the entrance. At the back of the excess part of the T-shirt, sleeves, secure with pins or sew by hand.
To prevent the house from leaning to the side, you need to securely fasten the wire at the base. For greater reliability and durability, instead of cardboard, use a sheet of plywood, foam plastic, or chipboard. The T-shirt can be easily removed, you can periodically replace it with another one, cats do not distinguish color and will not notice the substitution.
A do-it-yourself cat house made from a T-shirt can be used as a stationary or mobile one.
Cat house from an old monitor
A non-working TV will still come in handy around the house. It turns out to be a beautiful, durable, reliable house for a family of cats.
Material: 
- Water-based paint;
- Soft fabric for interior upholstery;
- Mattress fabric, foam rubber;
- Stickers;
- Glue gun.
Scheme and drawings:
- Remove the inside of the old monitor and remove the screen;
- Cut a round hole on the side that will serve as the entrance.
- Paint the monitor with paint of any color, but the main thing is that it is water-based.
- Sew upholstery for the inside of the house. The material should be used in such a way that it is not electrified, since constant friction of the wool can provoke a discharge. The upholstery is secured with glue.
- The mattress is sewn according to the size of the monitor.
- Various stickers are placed on the plastic screen so you can draw something. Kittens will look at them with interest, and for people it will look like a computer monitor, and the screensaver will be live kittens or a cat.
The house for the cat is ready with your own hands. However, this point should be taken into account. Plastic does not allow air to pass through and is a synthetic material. Staying in such a house is unsafe for health. That's why. Still, it’s better to refuse such a house.
Wigwam for cats
A home made for a cat with your own hands, in the form of a wigwam, is made like a home made from a T-shirt. Its height should be 60 cm. Cardboard, chipboard, foam plastic, and plywood are used as a solid base. The main task is to make a strong frame. Strong wire and wooden planks are suitable for these purposes. The outer fabric for covering the wigwam should be natural. They put it on top of the structure, the ends can be tied with ropes and ribbons. See instructions for making a T-shirt shelter.
DIY cat house from a suitcase
Nothing could be simpler. You will need an old suitcase. If the upholstery looks  not too good, you can put a self-sewn cover on top. The easiest option is to open the suitcase, put a pillow or mattress in it. The house for the cat is ready with your own hands.
To make all this look more interesting, proceed as follows. Prepare the legs. They can be carved from wood, if anyone knows how to do this, you can buy them ready-made at a furniture store, or use simple wooden planks. If there are several animals, you can make a two-story house out of one suitcase. Remove the suitcase lid. Attach the legs to the bottom of both parts. Place it like a bunk bed and secure it.
Instructions for a plywood house
A house made for a cat with your own hands from plywood is the most  practical, durable. Any complex design can be made. As a rule, it contains a booth, an observation deck, and a scratching post.
Material:
- It is better not to use plywood sheets up to 12 mm thick, chipboard, since the material contains foreign odors;
- Hemp rope, tourniquet for making a scratching post;
- PVA glue, after drying it leaves no odor;
- A dry stick with a diameter of at least 15 mm;
- Foam rubber;
- Quilted synthetic winterizer for making bedding;
- Upholstery furniture fabric from an old sofa, armchair.
Scheme and drawings:
- The interior of the space should be comfortable for lying. The average box dimensions are 40*60*40 cm. For large breeds, recalculation is made based on body size.
- The diameter of the hole at the top of the box should be such that the cat can easily pass through. Average diameter 20 cm.
- The observation deck is made at a height so that the cat can easily climb up, standing on its hind legs. The platform itself should be such that the pet can fit well on it.
- Lubricate the stick with PVA glue and wind the rope tightly without gaps. This will be a scratching post.
Plywood drawings can be very diverse. A typical house looks something like this:


Tools:
- Hacksaw or jigsaw;
- Screwdriver;
- Hammer;
- Scissors;
- Awl;
- Ruler;
- Glue brush;
- Pliers.
Cut: 
- All elements of the house and observation deck are drawn on plywood. Cut with a jigsaw. You will need 4 rectangles 40*60 cm for the side parts of the house, the base is 80*120 cm. The house will be attached to it. The roof is made either three-dimensional, then additional parts are cut out, or a rectangle - size 70*70 cm.
- A round hole for entry is cut out in one of the rectangles. And also on the plywood, which will serve as a roof, there is a hole for climbing to the observation deck.
- Prepare 2 sticks of equal size. One will be installed on the roof, the other on the plywood base.
- It would be better if the roof is removable. This will make it easier to clean the house.
- They cut out foam rubber for the upholstery of the inside of the house and the observation deck.
- Prepare the base for the mattress.
Drawings and sizes are individual.
Assembly instructions:
- The inside of the house should be soft. Foam rubber is glued onto the plywood, fabric on top, and upholstery material from an old sofa on the outside.
- Prepare the claw sharpener and install it on the base using glue.
- All parts of the house are glued together, installed on the base, and secured with glue.
- Lastly, the observation deck is installed.
A house made for a cat with your own hands will become a real decoration of the apartment. It must be installed where the cat likes to spend time. If she likes to climb onto the windowsill and watch what is happening outside, it is worth placing the house closer to the window. If the cat strives for warmth, closer to the radiator or in a sunny place.
These are the nests. It’s quite easy to make, 2 circles of fur, a foam rubber circle, pulled together a string threaded around the edge, and you got a nest! Kitties love to sit in them.
Cut out 2 circles (thick fabric and fur) 80 cm in diameter, and a circle of foam rubber 40 cm in diameter! Sew 2 large circles on the wrong side, turn them right side out, insert foam rubber, and sew on the right side around the foam rubber. From the edge of the large circle, retreating 1 cm, we stitched, inserted a lace there, and pulled it together. Well, there’s decoration: pompons, etc. already to taste! 

HOW DO YOU LIKE THE CAP?
Cap tip. Source materials: 2-centimeter foam rubber, better elastic fabric such as stretch velvet, fleece (in my case), but flannel and even cotton or linen will do just fine. For naked people I take fleece, it’s warm. How I made the pattern. Take an orange, cut it into 6 slices, remove the peel, cut it in half crosswise, and here in front of you is a mini pattern of one part. The size of my cap is 50 cm in diameter excluding the visor and 30 cm in height. Let's remember the math - the circumference of a circle is 2Р=2 x 3.14 x 25cm=157cm. This is the circumference. Divide by 6 = 26cm. Here are the finished dimensions of one triangular cap wedge - base 26 cm, height 35. Cut 6 parts from foam rubber. Cut the parts from the fabric with an allowance of 2.5 cm. In one, cut out the entrance arch. Next, take the foam rubber, place the fabric on both sides, face outward, and baste both fabrics together, leaving the foam rubber between them. The elasticity of the house depends on how tightly you wrap the foam rubber. Sew the pieces together along the sides of the triangles.
Further. You have a dome without a bottom. Cut the bottom, diameter 50cm, from foam rubber and also cover it with fabric, the seams facing out. Turn the dome inside out, sew the bottom, the seams don’t need to be processed, cut off the excess, turn the house inside out. Sew a 1cm foam rubber canopy separately to the house. I do everything by hand. Thick foam rubber will not allow you to make an even stitch on a machine. Although... That's it. Math will come in handy if you need a smaller or larger house. Another tip. To prevent the foam from bunching up when washing, baste the inner fabric to the foam without grabbing the outer fabric randomly, like the back of a sofa, or in separate lines. Verified. Good luck, everything will work out if you do it with love for your cat.

Materials:
Tapestry fabric, 2 m
Plain dense rep to match the tapestry, 1.1 m
Foam rubber 3.5 cm thick, 1 sheet measuring 1 x 2 m
Clothesline, 2 m
Tools:
Long needle, breadboard knife (or scissors)

1. Transfer the patterns onto graph paper. Prick the corresponding roof piece onto the foam rubber and cut it out with a breadboard knife. Make the second part mirror symmetrical. Also cover the foam bottom with a diameter of 55 cm.

2. Hand sew the darts over the edge. Also make the back seam, aligning the sides with the number 1.

3. Place the bottom into the foam “roof” and connect the parts at the front, sewing the sides with the number 2.

4. Cut out two pieces each of the exterior and interior decoration of the house from tapestry and plain fabric (see diagram). Make them mirror symmetrical. Cover the bottom round bottom with a diameter of 66 cm from tapestry fabric. The bottom for internal processing with a diameter of 55 cm is made of plain finishing fabric. Open out all the details with an allowance of 1.2 cm. Sew darts on the details of the external and internal processing of the house (they are marked with crosses). Sew the back seams 1 cm from the edge.

5. Connect the numbered sides of 4 pieces of a single-color facing (top seam). Sew this part along the sides with the numbers 5 with the blank for the interior decoration of the house. Sweep the blanks for the interior and exterior trim along the sides with the numbers 6, aligning the same icons (see diagram). Make sure that the pieces meet along the long sides of the front of the house, and sew the sections with numbers 2 together with a seam 1 cm from the edge. Also connect the sides with number 3. Sew the basted seam (with a seam 1 cm from the edge).

6. Sew decorative piping to finish the bottom of the house. To do this, cut out a 3 cm wide bias tape from a plain fabric. Place the cord in the fold of the tape and stitch as close as possible to the resulting roll. Use a special zipper foot for this, moving the needle to the far left position. Sew the piping to the bottom edge of the outer trim of the house (along the edges with numbers 7). To the bottom edge of the interior trim (along the sections with numbers), sew a bottom made of plain fabric (55 cm in diameter), having previously basted it. Make the seams 1 cm from the edge.

7. Place the cover on the foam frame and straighten the facing piece made of finishing plain fabric. The stitch seam should run along the outer corner of the foam roof. Align all fabric parts with foam parts, eliminating distortions. Secure the interior trim with tack stitches, piercing the needle all the way through the foam, out and back.

8. Place a round tapestry piece (66 cm in diameter) onto the foam bottom. Fold the seam allowance inward and pin the edge to the piping. Connect the pieces by hand using an over-the-edge stitch using threads to match the tapestry.

Advice:
The end of the dart forms a bulge. Iron it in steam mode.
Do not sew the inner bottom to the foam base, but simply tuck the fabric between the bottom and roof pieces (in a circle). Then you can take it out when necessary and shake off any accumulated fur and debris.
If you do not find foam rubber 3.5 cm thick, adjust the pattern. If the material is thicker, add the difference to the allowance on the number 5 side (or reduce the allowance if it is thinner). In this case, the radius of the bottom parts made of foam rubber and finishing fabric will change accordingly. Be sure to first sweep out the parts and try on the cover.
Cat house.
Healthy sleep without drafts, in a soft, cozy bedroom... Isn’t this what all living creatures on earth dream of? What about the cat? She is also a “person”!

Like everyone else living in the house, the cat should have a place where it can retire and sleep peacefully. Our Vika chose a suitcase for this purpose, lying on the very top shelf of her wardrobe. And everything would be fine, but firstly: she climbs in there using our clothes, and secondly: she is not visible there and, in order to make sure that the cat is at home, she has to be disturbed. Besides, a suitcase is not the best place for a young lady to rest.
The thought of a sleeping place has been in the air for a long time. I even made an attempt to kill two birds with one stone by building a cat house - a kind of entertainment center with a bedroom. But Vika appreciated the building only as an entertainment center, and the house as a large and comfortable scratching post. Perhaps if I had placed the house under the ceiling and not on the floor, it would have become the cat’s favorite bedroom...
To start work, I bought a sheet of foam rubber 2cm thick, faux fur and padding polyester. Foam rubber is the frame of our structure, and let’s start with it. It’s worth stopping here and warning - all this is pure improvisation - the dimensions were taken from the ceiling, there were no preliminary drawings and everything was drawn on foam rubber with whatever came into play. I made the base of the bedroom almost oval in shape, namely: I drew two circles with a radius of 20 cm with a space of 10 cm between the centers. The side must correspond to the length of the “oval”, namely: the length of a circle with a radius of 20 cm plus 20 cm (two distances between the circles). The formula for the length of a circle is =2pR. In our case, 2x3.1415x20+20=145.66cm. I got 150cm (it happened that way). I made the side 20cm high with a 10cm deep cutout for the entrance, and I made the same cutout in the roof. To create the roof, I made almost the same “oval” as for the base, but with circles with a radius of 30cm. The perimeter of this “oval” is 2x3.1415x30+20=208.49. Plus/minus the error I got ~60cm difference between the roof and the base. This difference will make our roof convex. 60/4=15cm - I cut 4 wedges from the roof, the base length of which was 15cm. All that remains is to cover the frame with fabric.
I'm not much of a tailor. Therefore, I transferred this part of the work to my mother. We don't have a sewing machine at home, so everything is done by hand. The interior lining of the bedroom consists of faux fur, and the exterior is made of an almost new, but hopelessly damaged, satin bedspread.
The pattern for the pillow was made according to the external size of the bottom. Thick padding polyester folded into four was used as filler (thin padding polyester, I think, should be folded 8 times). To prevent the padding polyester from falling off inside, it was secured with several stitches around the perimeter of the pillow. A couple of days passed from the moment of sewing the house to sewing the pillow, during which time the cat managed to get used to it and the beginning of fussing around the pillow aroused the cat’s wild interest. To fill the pillow with padding polyester, I had to fight with a wild animal for the pillowcase. And when the pillow was ready and put in the basket for fitting, the cat immediately jumped inside, tucked her paws and narrowed her eyes, saying with all her appearance: “I’ve been sleeping here for half a day, and you’re walking around and disturbing me.”
The roof should be attached to the side with tape, but this is not ready yet, since the cat liked to sleep without a roof, and the inverted roof became an alternative basket.
Vika happily sleeps in her new bedroom and dozes in the upside-down roof. For two days I didn’t remember at all about the suitcase I slept on before, but now I sometimes climb into it, out of old memory. I'll try to wean it off.
I'll share my idea. The bed is made very simply and quickly. If I was able to build it with my crooked hands, then anyone can do it.
The bed requires 1.5 cm thick foam rubber and covering fabric. I took fleece.
Cut 2 circles from foam rubber, the diameter is equal to the size of the couch. Put them together. Cut 2 circles from the fabric: the first is the diameter of the bed + 0.5 cm for the seam, the second is the diameter of the bed + thickness (3 cm) + 0.5 cm for the seam. Place the foam bottom on the larger circle and cover with the smaller one, sewing the edges.
All family members need their own secluded place in the house where they can relax. Our four-legged pets are no exception. Most cat owners are aware that their pets often hide in boxes, closets, drawers and other secluded places. So why not worry about your pet and make a cat house with your own hands, especially since now it’s easy to find drawings with dimensions and instructions for making a simple design.
Why do cats need a secluded place?
Many people wonder: does their pet really need a home? The answer is clear - it is necessary, because animals need somewhere to rest from the close care of their owners. Many people mistakenly believe that a cat doesn’t care where to sleep, because you can often see it stretched out on the sofa or in any other place. But the animal rests anywhere precisely because it does not have its own place. Therefore, if the pet’s owners really love him, they should definitely make him a secluded home.
Many people think that making a cat house doing it yourself or buying it in a store is absolutely useless, since this does not mean that the cat will like it and sleep in it. In part, this opinion is not unfounded. But if the house is ready, and the animal avoids it, then do not despair. Perhaps the cat is simply sniffing at a structure that is incomprehensible to it and cannot figure out what it is for and what to do with it. And even if the owners help the animal get into their home, it will not necessarily sleep there.
Maybe the cat just doesn’t like the location of the house. In such a situation, you need to try to place the structure in different rooms or corners of the apartment. Very often cats like to lie on window sills and it may be necessary to place their home there. Plus, many felines have chosen places at higher elevations, so you need to experiment.
Requirements for a cat house
Before you start making a cat house with your own hands, you need to define its configuration, on which the drawings and dimensions of the structure will depend. The main requirements for cat houses are the following parameters:
Also of great importance are overall dimensions of cat housing. Before making a house with your own hands, you need to prepare a drawing in accordance with the recommendations of experts:
- height from 40 cm;
- the perimeter of the structure for medium-sized cats should be 45 by 45 cm;
- the inlet hole in diameter should be 15 cm or more.
To make your own cat housing from scrap materials, a person does not have to be an experienced carpenter or have special knowledge in the matter of construction.
What is the difference between houses for cats and cats?
The cat is very comfortable on the roof of the cat house, which has only one entrance. After all, all that a domestic predator may need is a place where from time to time he can retire from prying eyes, and most importantly, an overview to monitor everything that is happening in the area.
In turn, cats love it when in their home there is an additional entrance, and it’s more convenient for them to view everything around them not from the roof, but from an additional stand in front of their home. This feature is primarily due to the fact that the cat views its house not only as a place for privacy, but also as a shelter for future offspring. Therefore, for safety reasons, an additional exit is needed to make the cat feel comfortable and protected.
We build a house for a cat with our own hands
 Today, every pet store in our state has cat houses for every taste and budget. A pet house is a very useful thing in which cats can rest in complete relaxation. They feel that their owners care about them and will reciprocate their feelings. But buying a house is not the only opportunity to take care of your pet. Moreover, a full-fledged cat housing is quite expensive, and making it with your own hands from scrap materials such as plywood, foam rubber, or even newspapers is not a big problem. But first you need to understand the design features of a cat’s home and the stages of its construction.
Making a cat house from cardboard boxes
One of the most popular materials for building a cat house is simple cardboard box. At the same time, it is not necessary to be a master in construction; all the work can be done with your own hands, for which you need to prepare the following consumables:
- a thick cardboard box;
- soft dense fabric;
- polyethylene or other water-repellent material;
- stationery knife and scissors;
- odorless adhesive composition;
- set for drawings;
- construction tape.
To make a cat house in accordance with the dimensions and drawings, you need to complete certain simple steps:

Such a cat house can always be modernized in accordance with the wishes of the cat owner or the characteristics of the pet.
We build a secluded shelter from newspapers
Another budget option for making a cat house with your own hands is construction of a structure from ordinary newspapers, which often accumulate on the balcony or in the pantry. And, despite the fact that newspaper seems to be an unreliable material, a house woven from newspaper tubes will be more reliable than its cardboard counterpart. Plus, if you show a little imagination and perseverance, a bed for a cat made from newspapers will look very attractive.
Before you make a newspaper shelter for your pet, it is important to worry availability of the following materials:
- plywood;
- adhesive mixture without pungent odors;
- stationery scissors;
- jigsaw;
- knitting needles;
- a pile of old newspapers.
So, how to make a house for a cat out of newspapers with your own hands? Step-by-step instruction:

At this point, the wicker house for the pet is considered complete. For the comfort of the animal inside and on the roof of the house soft pillows are laid.
Soft cat housing made of foam rubber
Special attention should be paid to soft cat housing, which can be make your own from foam rubber. Here, a person has many opportunities to show his own imagination in making a cozy corner for a cat with his own hands. To make a soft structure, you will need:
- any piece of dense material;
- thick foam rubber;
- sewing accessories including a machine;
- strong thread.
To make a cat house, you need to do a number of simple steps:

As you can see, making a cozy home for a cat with your own hands is not a big problem, especially since there is always everything in the house necessary materials at hand. The main condition is to approach the issue with due responsibility and show a little imagination.
